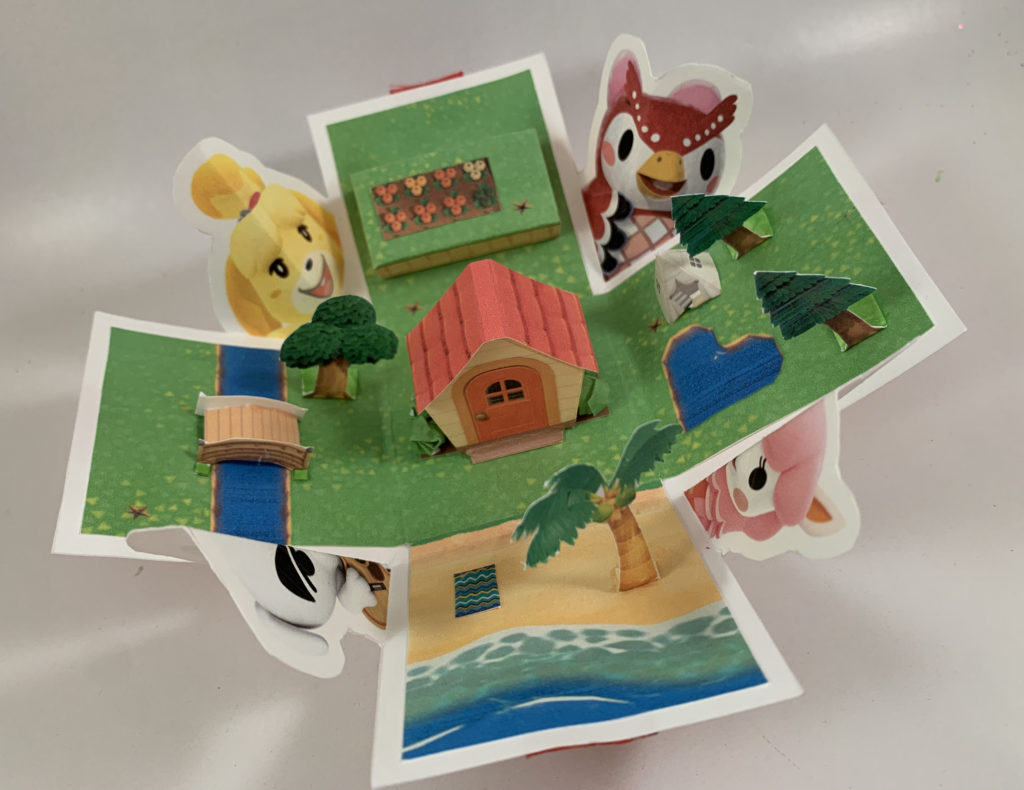
I’ve always been very fascinated with exploding boxes so I decide to make an Animal Crossing themed one. Usually exploding boxes have just flat images like a scrapbook which was my original intention, but as I was planning it turned into more of a pop-up book which I actually love! It’s like a little island in a box! If you want to make this one I have included the templates. Enjoy!
What Will It Bee? Gender Reveal Party
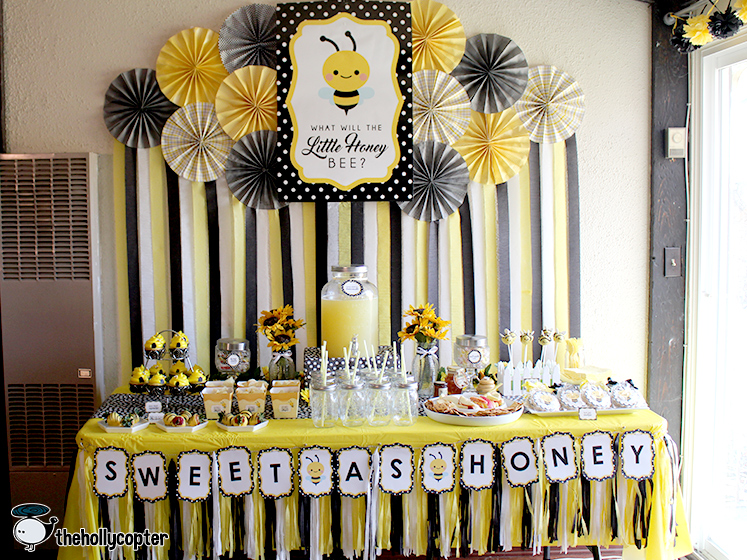
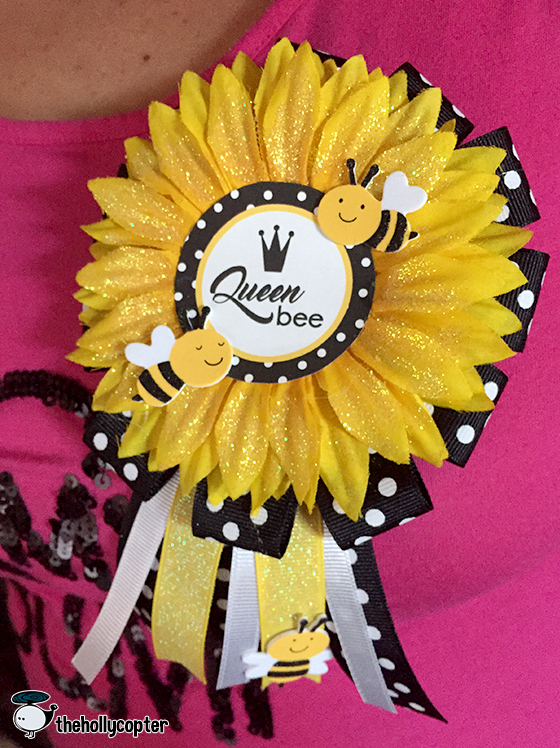
When my dear friend, Estrella, told me she was pregnant I knew I HAD to plan her a gender reveal party. She loves bees, and they’re perfectly gender neutral so I went for it. I got a lot of inspiration from Pinterest which I’ll link throughout.
For the party I decided to go with more of a polka dot theme instead of stripes because, well, I think polka dots are cuter. So there.
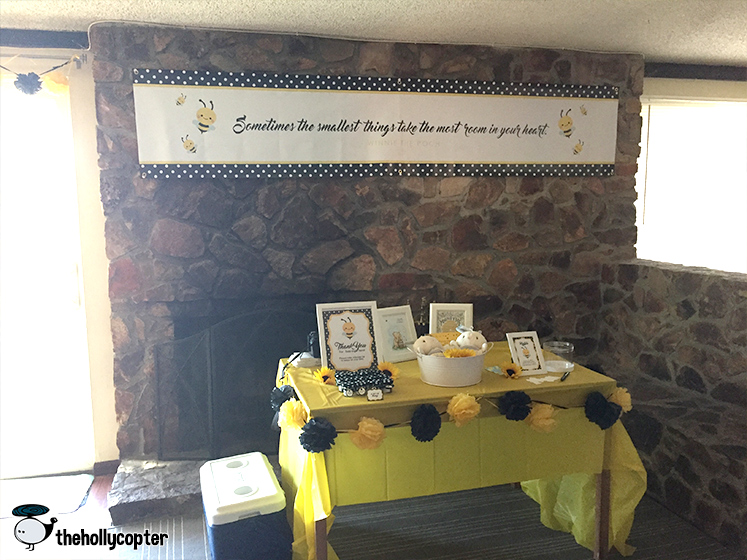
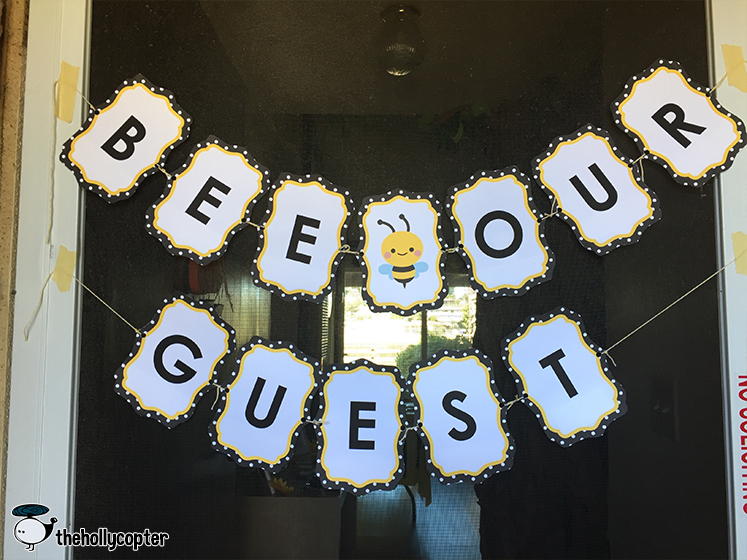
I designed the poster and had it printed as the main centerpiece along with paper fans I made with scrapbook paper and some streamers. Note: hot gluing streamers to the wall is a very bad idea. I designed the banner for the front of the table as well as all the labels for the food. The front tassel garland was made by me, it took a long time but man does it look pretty!
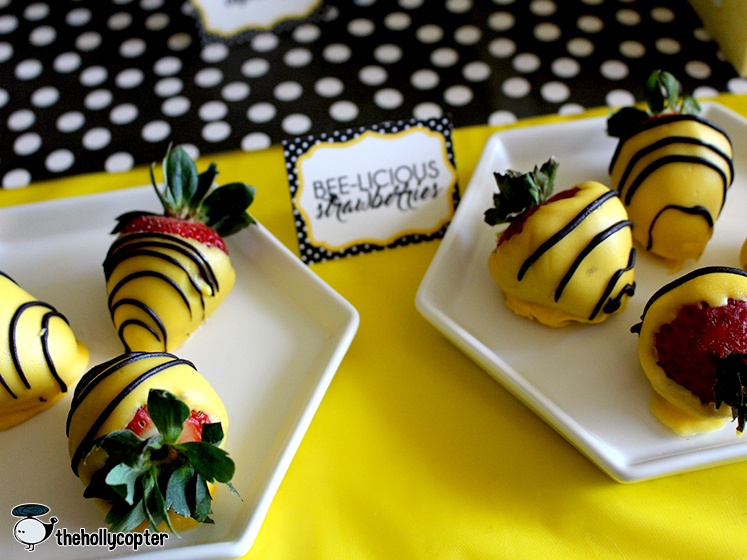
For the cupcakes I used pre-made bee decorations by Wilton and I made little “doors” to the hive using black candy melts. The cupcakes were lemon flavored with buttercream frosting (I don’t like canned icing so I went to my local bakery and asked for yellow buttercream. Only $2 and MUCH yummier!). Polka dot cupcake liners to match everything. The runner on the table is a roll of paper from Michaels in the party section.
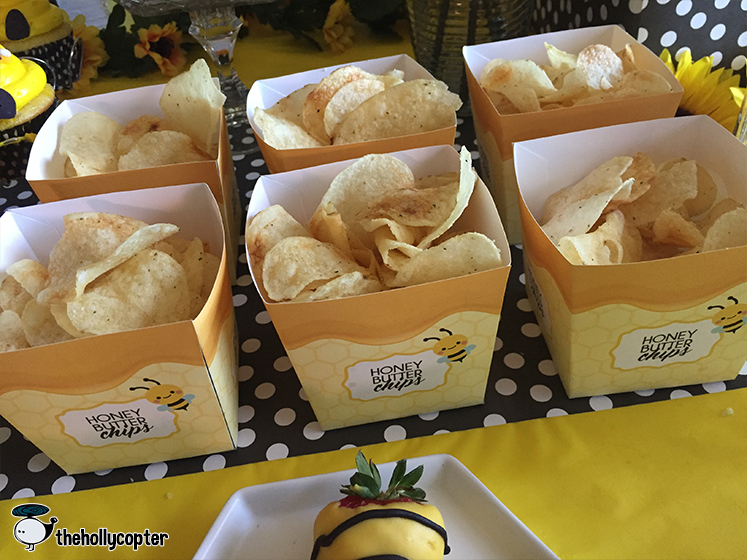
Note: Honey butter potato chips are AMAZING and very addictive. If you have a Daiso near you they have them there (or other Asian food markets).
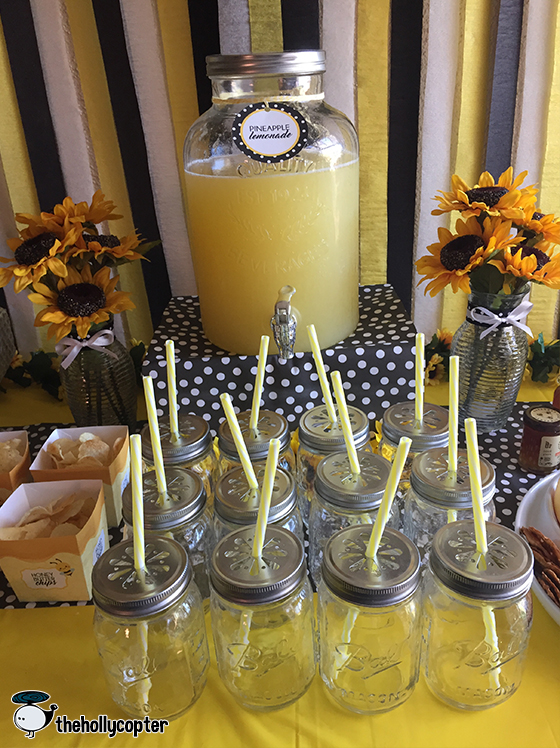
Pineapple Lemonade was a hit – recipe here. I LOVE the look the paper party straws but they dissolve and get all gross so I opted for plastic straws with cute lids and they worked so great! They also doubled as a party favor as we let everyone take theirs home.
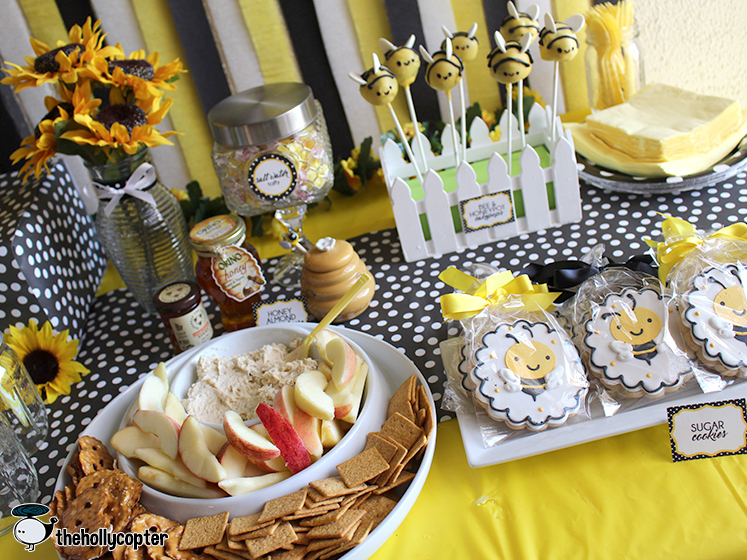
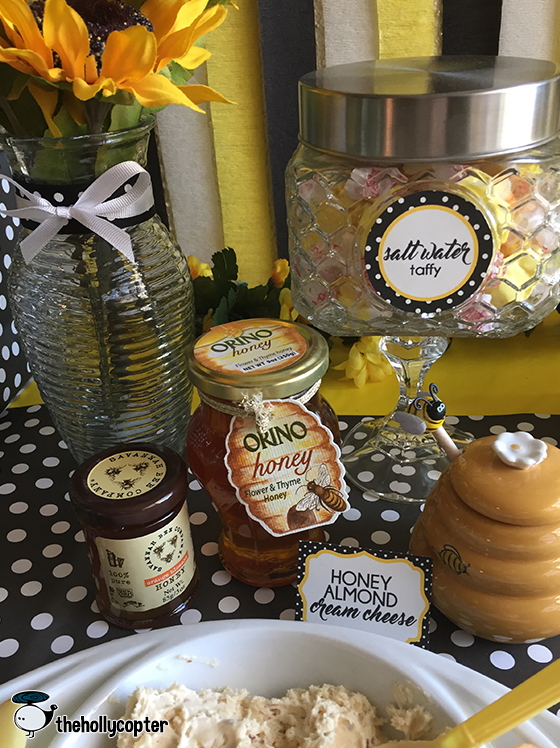
I got Honey Almond cream cheese from Einstein’s bagels and had things to dip in it – everyone loved it! I also had a cute little honey pot in case anyone wanted to add extra honey.
Found these really cool jars at Home Goods that had a beehive texture on them, they were only about $3! They had a rooster on them though so I covered it with a label – perfect. I glued a candle stick holder on the bottle to give it some height.
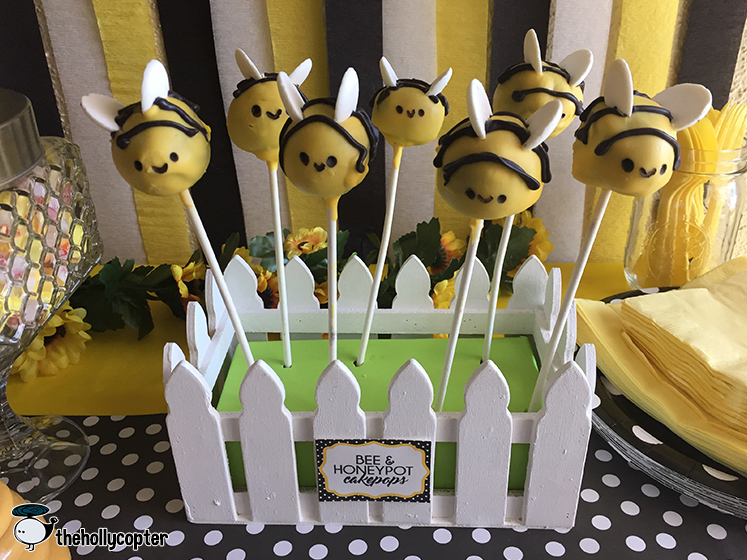
My house was extremely hot when I was making the bee cakepops and I was getting really frustrated but I think they came out pretty cute overall. To make the base I bought a little wooden fence from Michaels and covered a piece of foam with green scrapbook paper.
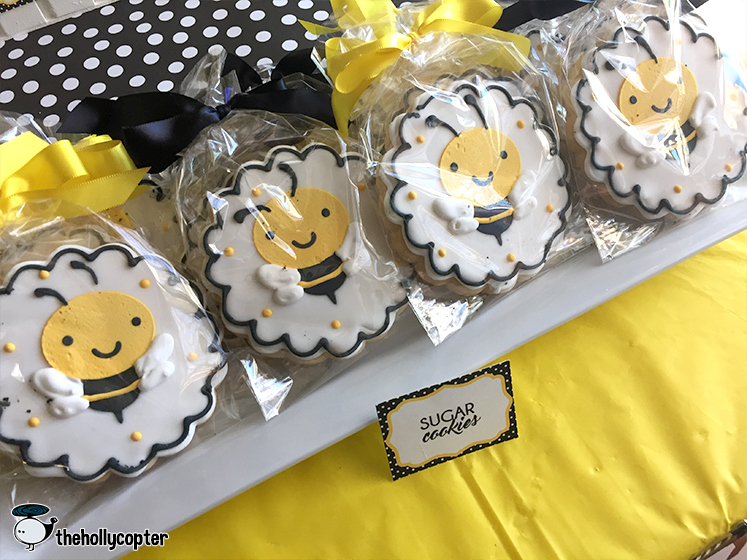
Cookies were from TSCookies on Etsy. So cute!
When guests arrived they put their name on the colored bee of their guess and attached them to a hive poster I had made.
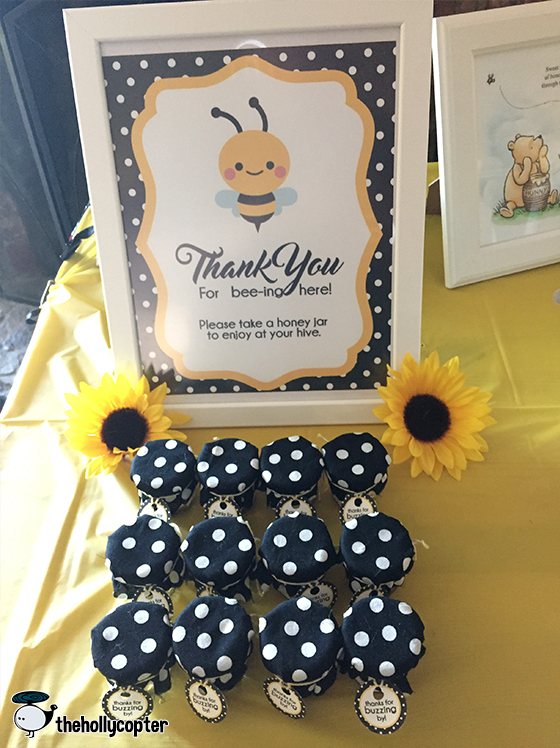
Honey jars as favors, wish I had a better picture of them 🙁
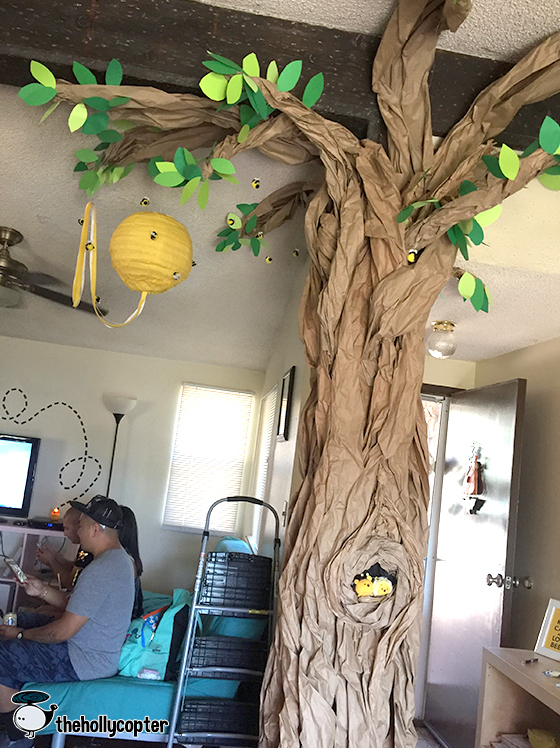
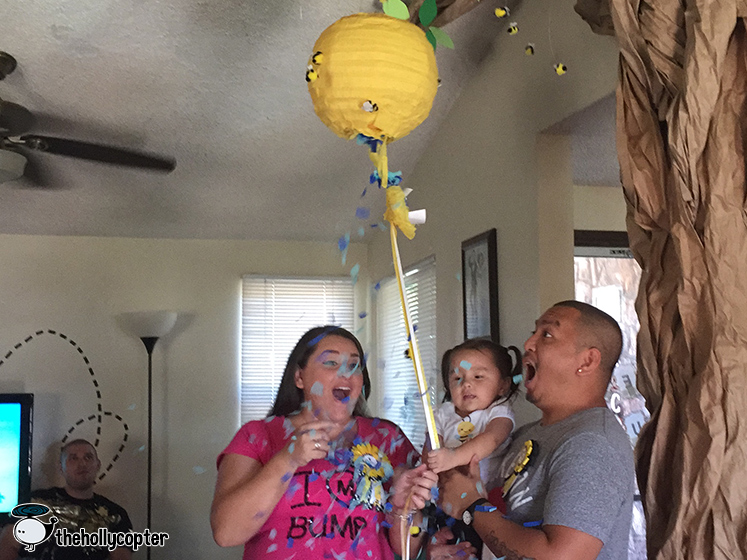
There’s this giant pillar in our house so I covered it with paper to make it look like a tree and hung a paper lantern piñata hive that had the gender reveal element in it. I added bees I made from this tutorial.
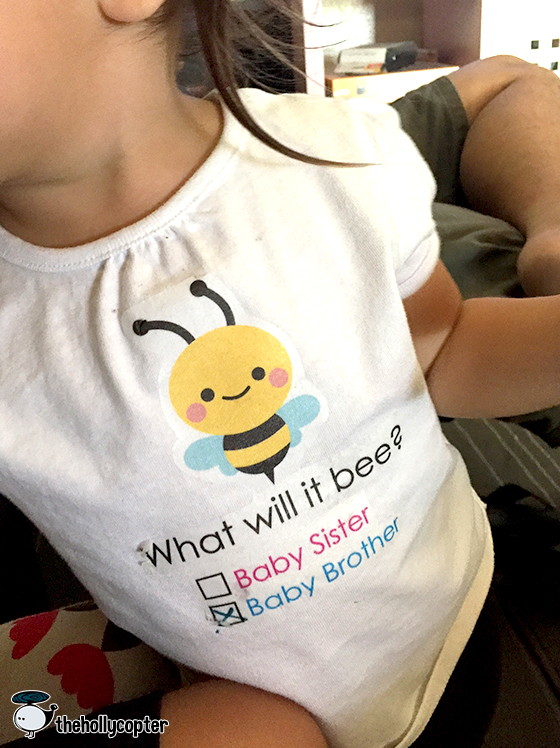
It’s a…
BOY!
Watch the video:
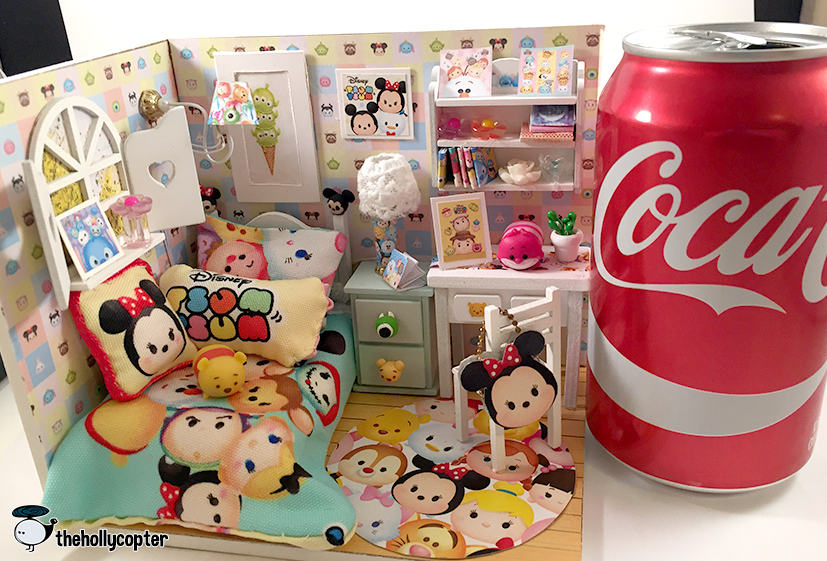
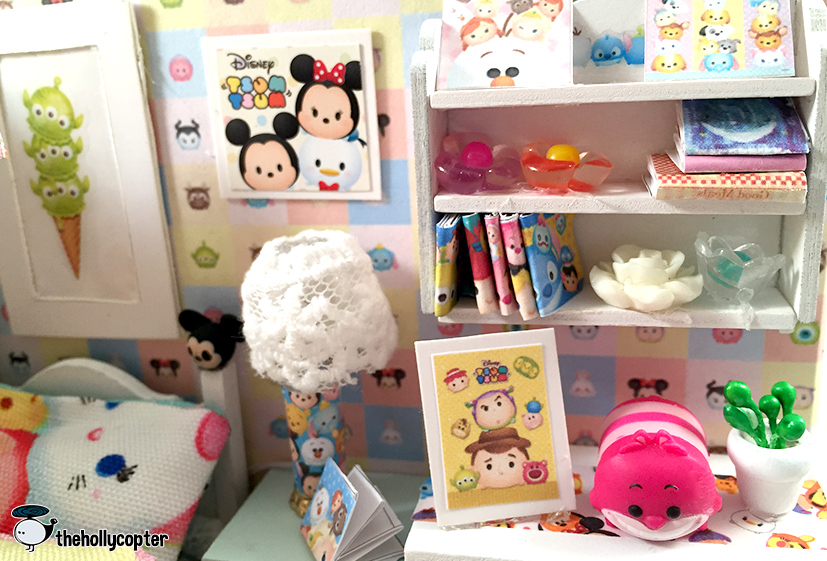
Tsum Tsum DIY Miniature Doll House/Room
Hello friends! I haven’t been this excited about a craft in a long time!
I watched Maqaroon’s video on a DIY dollhouse, gasped out loud, and then immediately bought it for myself. IT IS SO CUTE!
This kit is from Banggood and they have so. many. cute. dollhouses. OMG. I want all of them.
The coolest thing about this kit is the working lights! HOW MAGICAL! I almost died when the lights came on for the first time! The kit comes with the little LED lights and the battery pack (two AA batteries not included).
The kit comes with everything you need to build a tiny and adorable doll house.
Since I wanted to make mine themed, though, I bought some extra things like fabric, washi tape, and TEENY TINY stickers. Did I mention how small this kit is? I thought I would be able to use my Pukifee in this house but nope, she is way too giant for this tiny room.
Gluing the furniture together was the most time consuming part, but put on some good music and it’s a great and relaxing craft to do.
I highly enjoyed making all the little pieces and putting it together.
Overall this kit is super fun to do and you can customize it any way you want to which is the best part!
Watch the video I made on this kit:
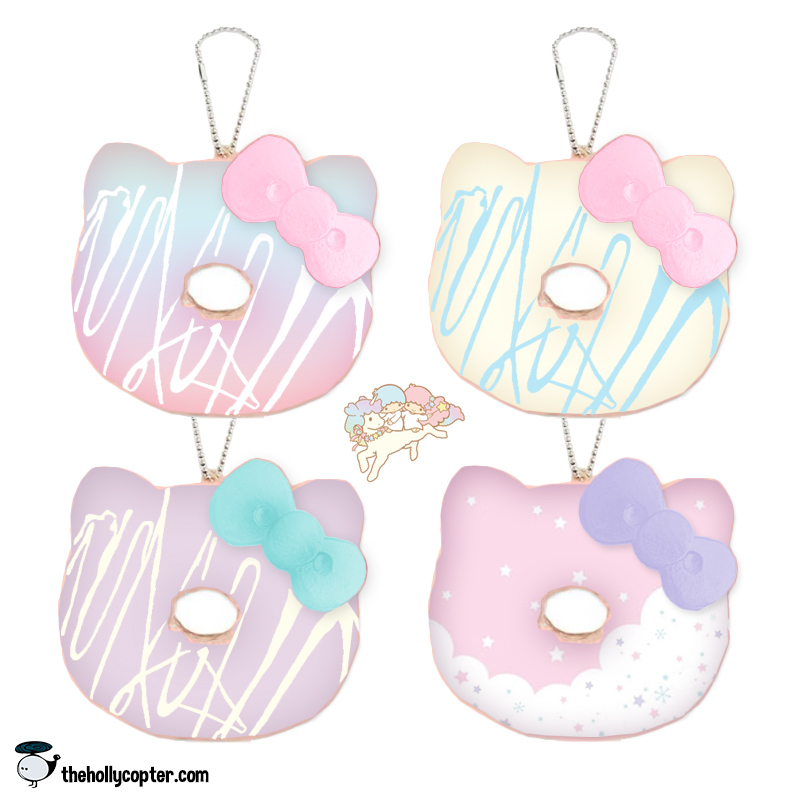
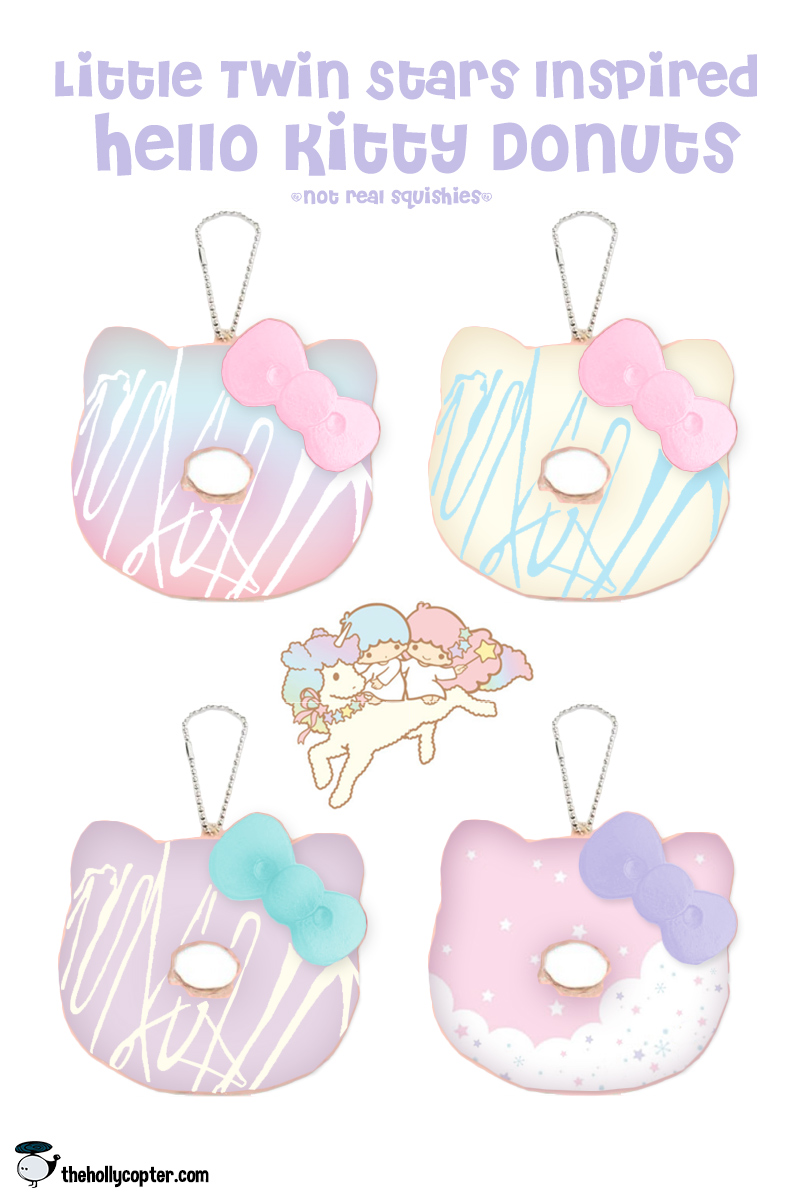
What if they made Little Twin Star inspired Hello Kitty donut squishies?
I love Little Twin Stars and the Hello Kitty donut squishies, so here’s what I think they would look like combined! These aren’t real, I just like the idea of them.
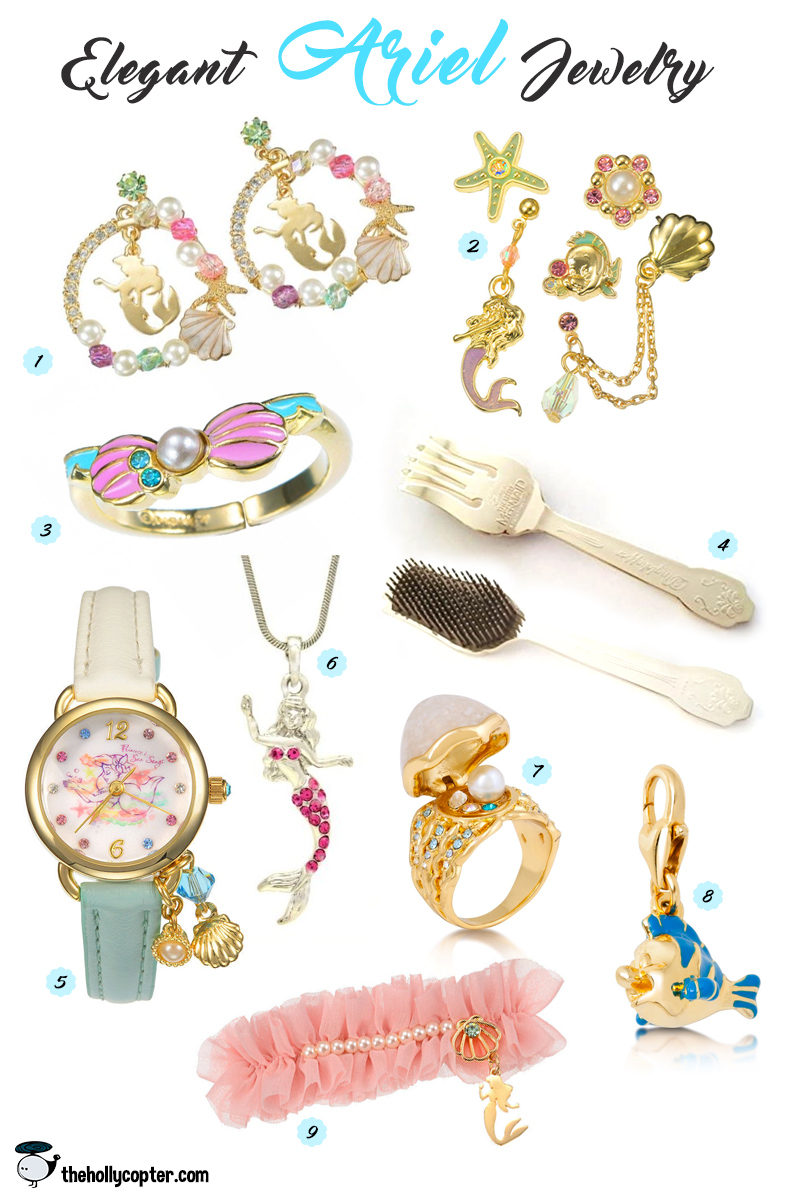
Elegant Ariel Jewelry
3 | My Treasure Ring
4 | Fork Brush
5 | Ariel Watch
6 | Swarovski Crystal Necklace
7 | Disney Couture Secret Pearl Ring
9 | Frills Hair Clip
Ariel is definitely one of my favorite Disney princesses because I love mermaids. There are so many cute Ariel items out there, I decided to break it down into categories, starting with jewelry. Of course the brush isn’t really jewelry but it’s a fork brush – FORK BRUSH! Too cute not to include here. There were so many other cute pieces including engagement rings:
More cute Ariel and Disney to come!
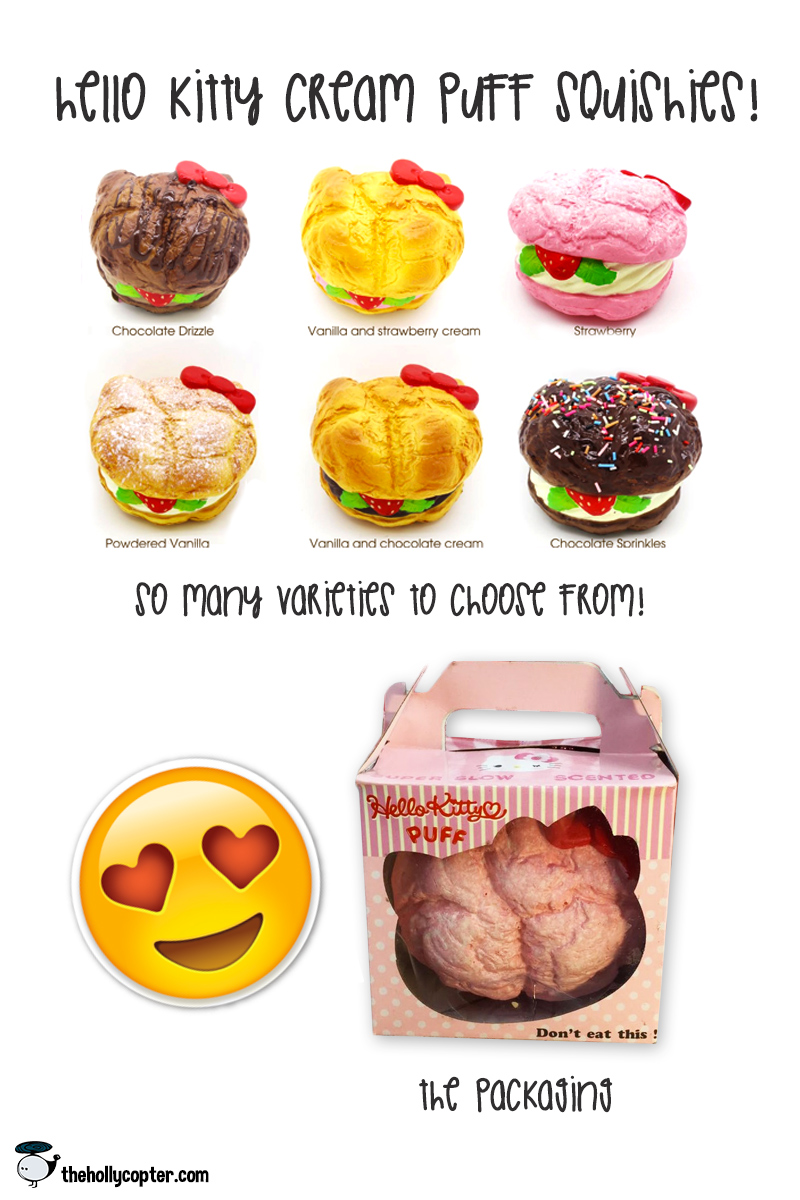
Hello Kitty Cream Puff (legit) Squishies!!!!
I remember about 3-4 years ago when kennedyscloset (I totally don’t remember how to spell her channel – does it still exist?) made a video showing an elusive and rare Hello Kitty cream puff squishy and I about fell out of my chair! It was the most beautiful thing, and there were only one or two other ones I had heard of that were selling for $200 or more. They fell off the face of the earth but alas…I never forgot them.
They made fake versions of them that I think look no where near the original, though I have heard that they are relatively squishy. They just don’t look nearly as realistic, the drizzle is puny, the bows are funky and there isn’t a strawberry in the cream – and that’s the best part!
THEN, MAGIC! I come to discover they are being reproduced and will have many varieties! HAPPY DAY! I am so so so so so excited and can’t WAIT to get these! I wish I could get all of them, heck maybe I will eventually, they are just so adorable. You can pre-order them (they ship end of January) at Silly Squishies.
Make Your Own Pullip! MIO Kit from JunkySpot.com
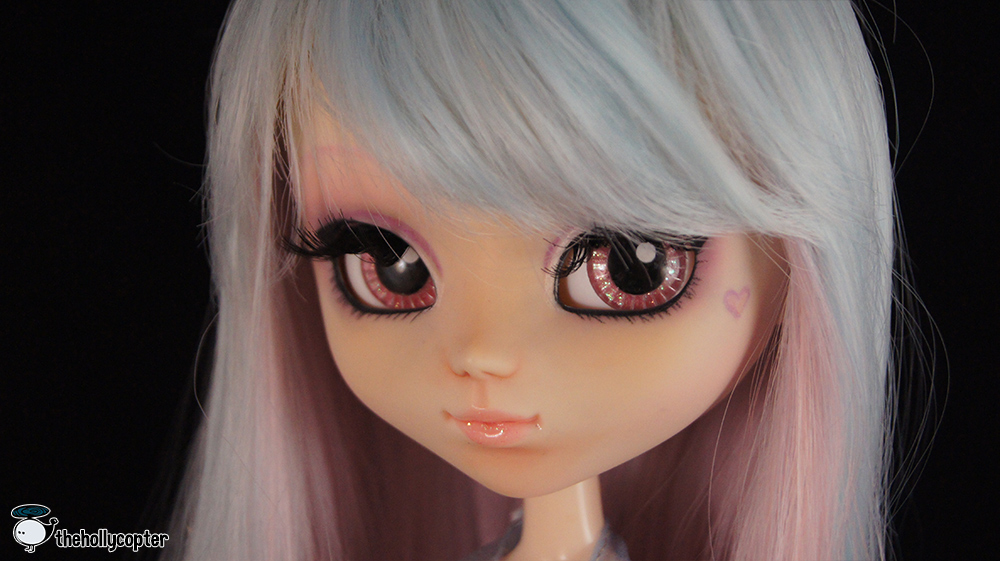
I got my very first MIO kit from Junky Spot and I have to say, it was probably one of the hardest but most fulfilling things I’ve done! I got super frustrated (I’m not the most patient person ever) but I’m quite happy with the result. The initial concept of the doll I wanted to create is a essential a cotton candy Alice in Wonderland, so I wanted most of her makeup and eyes to be pink. I’m going to get a curly pink wig and a pink Alice dress to complete the look! In the meantime I’ve put on a temporary wig and dress. But anyways, let’s get to the kit!
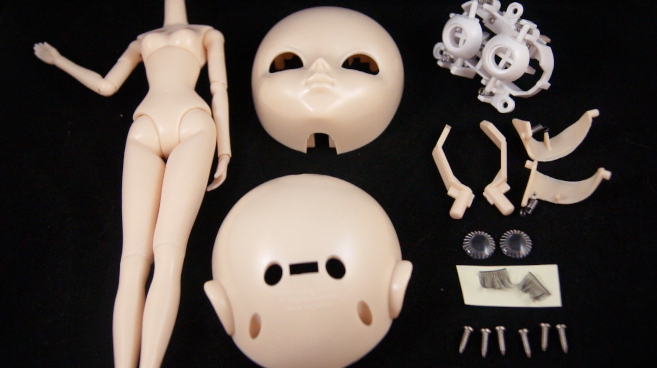
The kit comes with a body, face plate, head, eyemech, two wink bars, two eyelids, two blank eyechips, eyelashes and 6 screws. This kit is the normal colored skin, but Junky Spot has Fair Skin, Tanned Skin, and Pale Skin available as well.
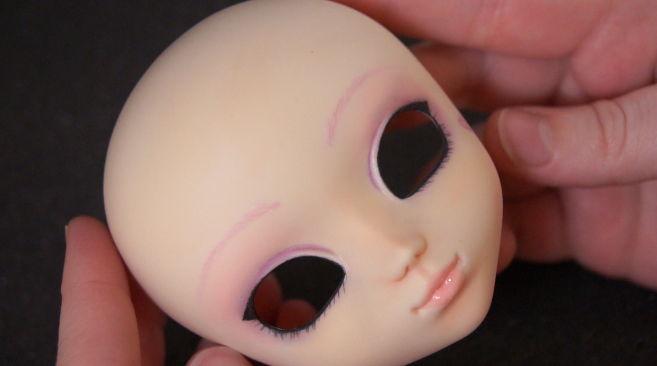
This was my first time ever doing a full faceup so I was really scared! Luckily it turned out ok and I’m pretty happy with the result. I used Mr. Super Clear as a sealant and then watercolor pencils and chalk pastels for the details. I had to redo it about 5 times before I was was happy (which is saying a lot because I’m NOT a perfectionist by any means!).
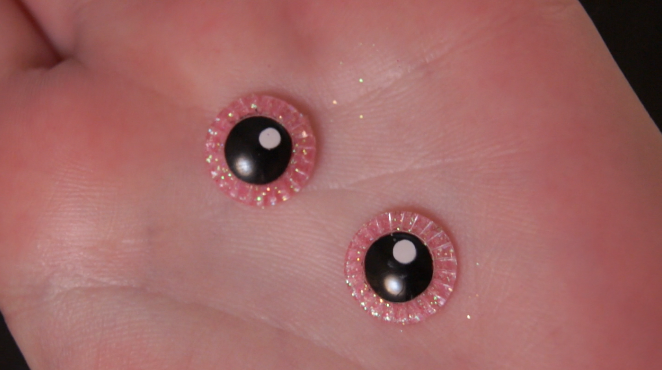
For the eyes I simply painted the centers with acrylic paint and then glued glitter around the outside.
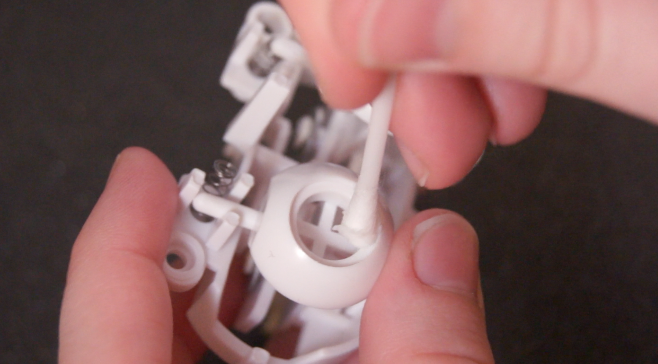
Once the eyes are dry, you can glue them in the eyemech.
It’s important to note that if you have glare spots on your eyes like I do, the top of the eyemech is the part with the two rectangle holes.
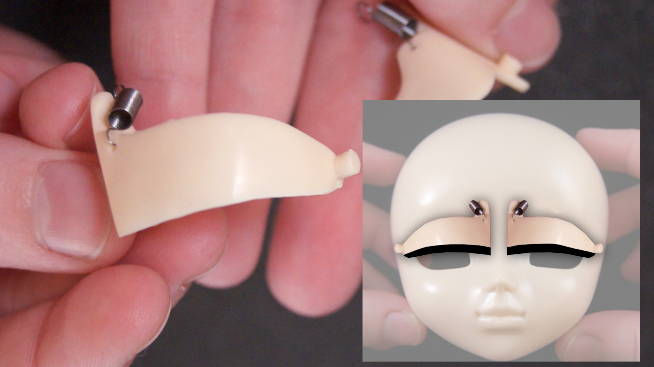
Now to decorate the eyelids, I just covered mine in glitter, but if you decide to do eyeliner, remember the flat edge is the bottom of the eyelid.
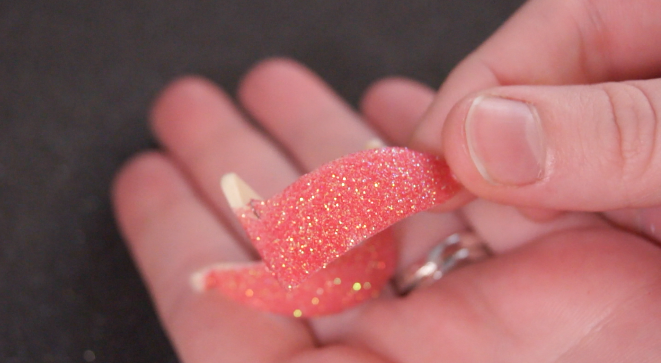
Pretttttyyyyyyyyy. Now for eyelashes. I didn’t use the ones from the kit as they were tiny, so I bought some fake ones from Walmart.
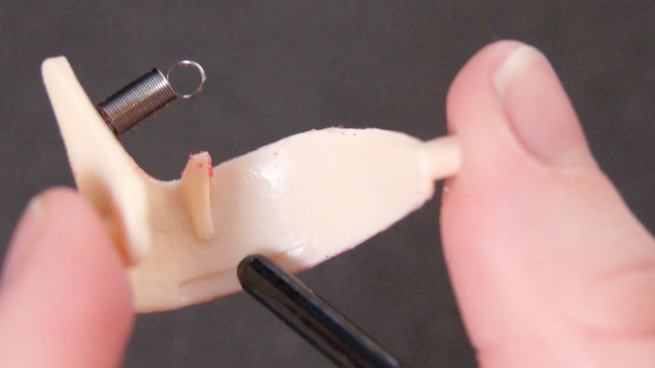
You’re going to want to glue the eyelashes in the area marked on the eyelid because if they go too wide, they may get bent in the eye hole. You can place them in the face to test it out and trim if you need to.
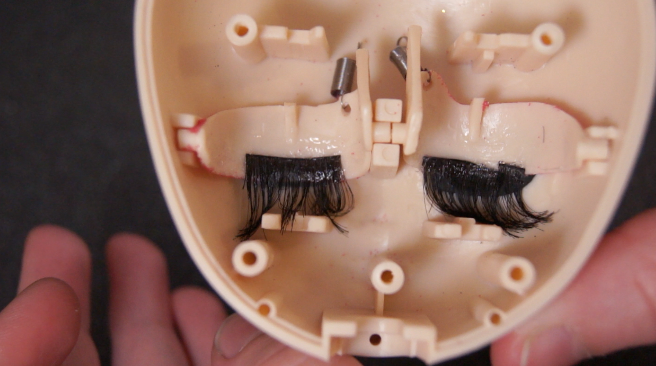
Now WAIT UNTIL EVERYTHING DRIES! No, really. Wait. I didn’t, and it was a huge mess and eyeballs like stuck and it’s not a pretty picture. Once it’s all dry, put your eyelids in the face like this. Make sure your little spring thingies are at the top in such a way you can grab them later.
Now you can place your eyemech in the face, remember those rectangle holes go on the top. Screw in three screws in the white plastic, there should be one on either side and one at the bottom. Do this as tight as possible without breaking anything, the eyemech needs to stay in there nice and good-like!
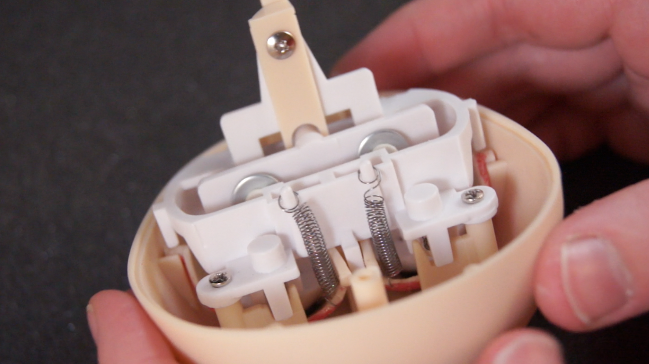
Now take the ends of the little coils and place them on the little white pegs. Don’t cross them or anything, that would be silly.
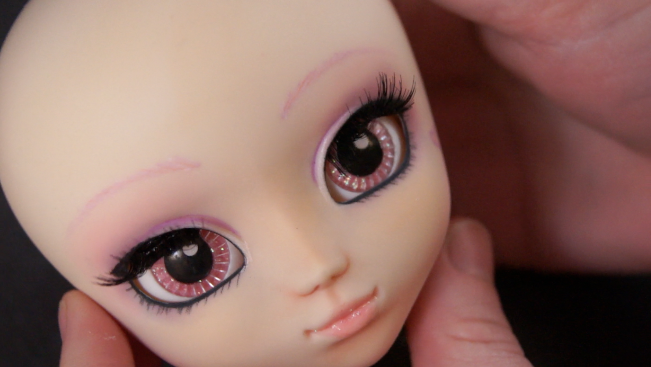
Yay it’s coming together! Check your eyes and make sure you can move them back and forth.
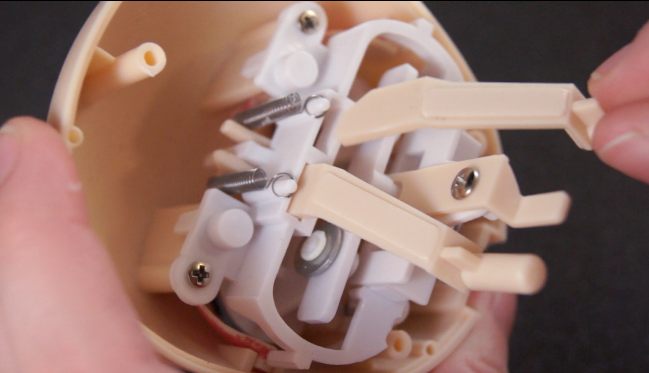
Now add your wink bars in the square holes. The diagonal cut part is toward the outside. Basically if you do it the wrong way, you’ll know when you try to put the head on.
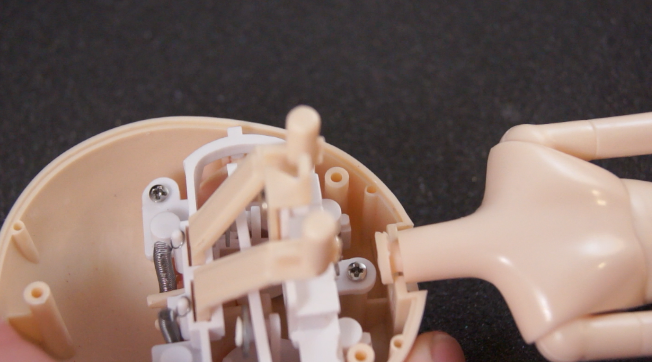
Now add in your lovely naked body. The body should fit all the way down into the neck hole.
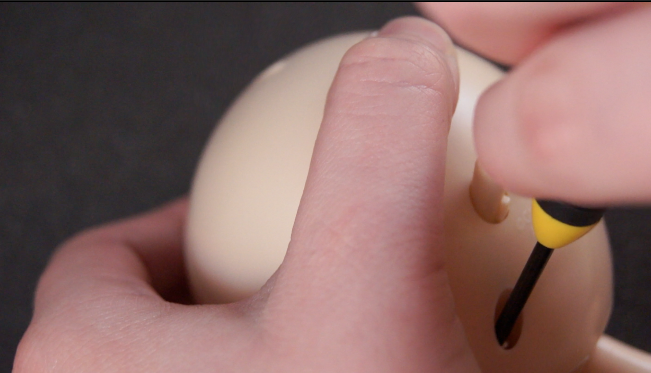
Now put on your head and all the pieces should fit in the holes. If they don’t, check your wink bars, they might be switched. Screw in the last three screws tight. There shouldn’t be any gaps in between the face and head.
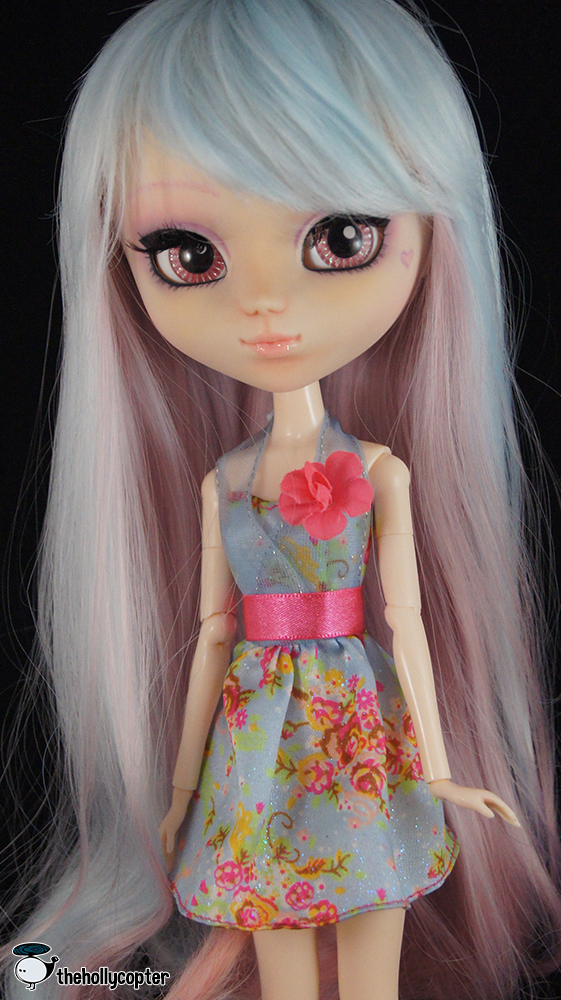
And now you’re done! You can add a wig (size 9-10 fits well) and some cute clothes. Like I said I’m going to get a new wig and clothes for this lady, but this is her temporary getup. I’ve named her Aliana. She’s for a friend 🙂
Check out the video on this tutorial!
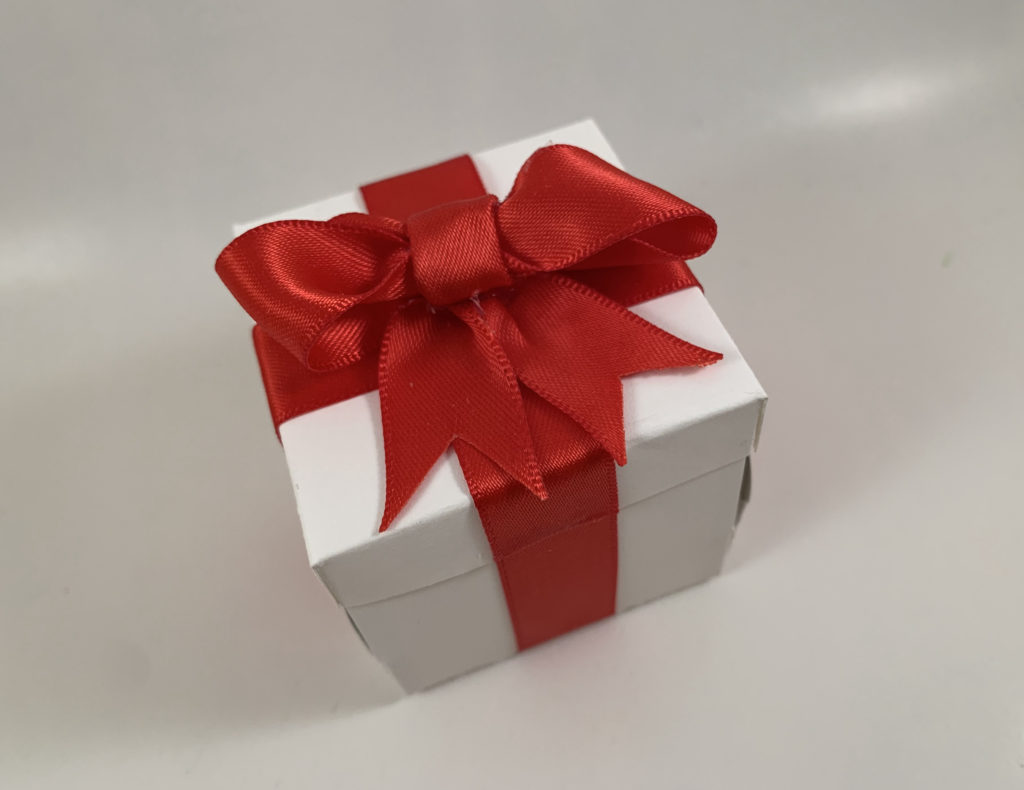
Kawaii Box + Giveaway!
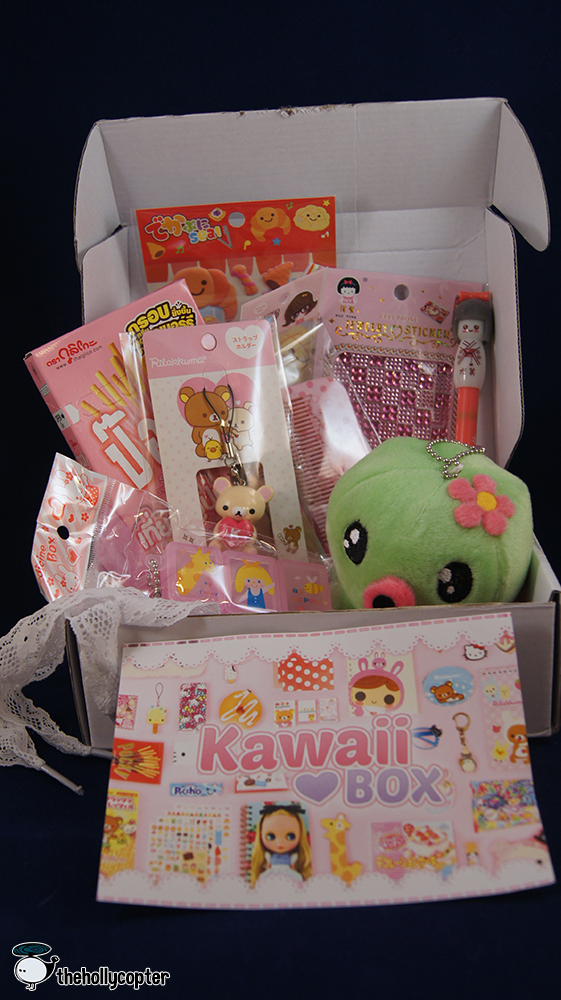
Today I got my Kawaii Box! This is a different box than the other one I’ve been doing reviews on, so there are currently two companies doing a subscription box called Kawaii Box. The previous one is through SuperKawaiiPop but this is the one through KawaiiBox.co. The Kawaii Box is $18.90 per month (free shipping!).
Let’s see what’s inside!
Included in the box was a cute octopus plus, a great pen, mustache ring (my favorite), shoe laces, strawberry pocky, and more! I think it’s a great value for the price! To enter to win your own Kawaii Box, see below!
Watch my video:
Kawaii Box is the cutest monthly subscription service. Subscribe and receive a box filled with hand-picked kawaii items from Japan and Korea directly to your home every month. Your box will be shipped in the beginning of each month and the shipping is absolutely free, anywhere on the planet! Each box includes 10-12 cute, original and licensed kawaii items.
ENTER BELOW!
TheHollycopter’s 50K Contest – Happy Natural Time
In celebration of hitting 50,000+ subscribers on my Youtube, I am hosting a contest and giveaway!
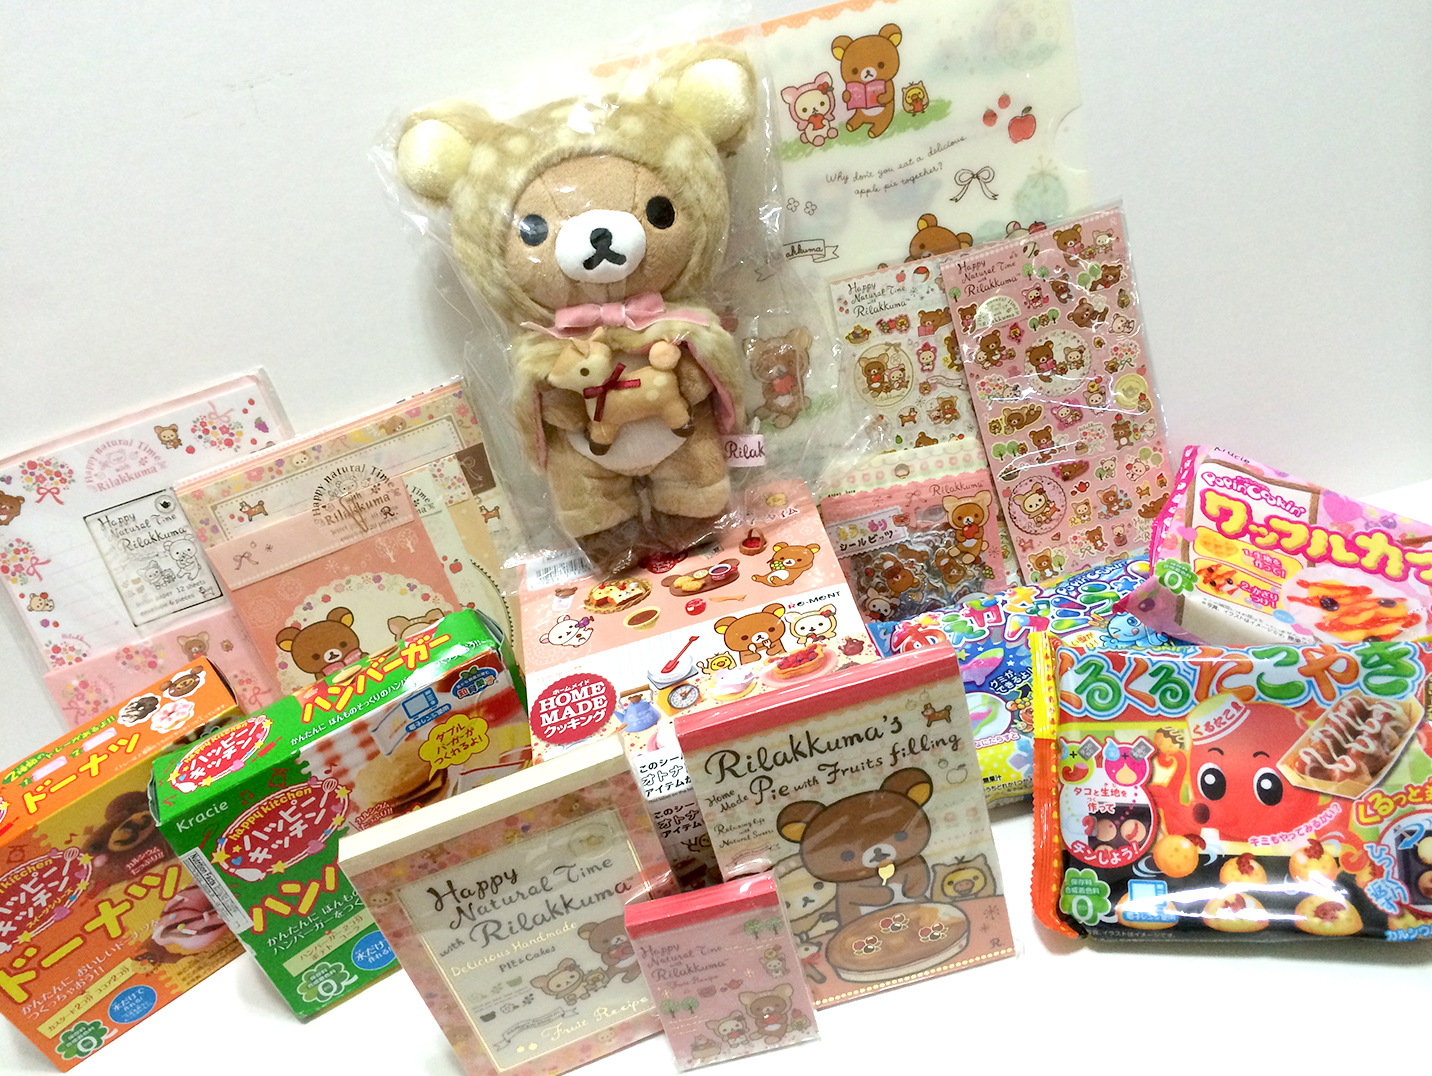
I had everyone vote on my Facebook page, and almost everyone chose a Woodland theme for this contest. I really love woodland themes, and especially the Happy Natural Time Rilakkuma series. It has deer, owls, really pretty imagery and it was the inspiration for this contest.
For the contest, you will choose a woodland creature. This can be a real animal like a squirrel, rabbit, deer, etc. or it can be something fictional like a fairy or unicorn or centaur as long as their home is in the woods. You will then create the creature and their home. Think of what cozy little nook this creature lives in, how they would decorate it and what furniture they would have. What is their favorite food? You must include at least three items in your house, and at least one piece of furniture. You can use any materials you want, be creative. Everything must be made by you. You can only enter one time, so make it a good one!
See my Pinterest board for woodland inspiration.
CONTEST:
– Create the home of a woodland creature (real or fiction) and the creature that lives inside
– Include at least 3 food items and at least 1 piece of furniture
– You can use any materials you want, everything made by you
RULES:
– Be subbed to my channel
– 18+ or have parents permission
– International
TO ENTER:
– Make a video of your entry (the creature, it’s home, at least 3 food items and at least 1 furniture item)
– Use the best quality camera you can and as good of lighting as you can
– Name your video “TheHollycopter’s 50K Contest”
– Post the link to your video in the comments on this video
You are not required to send your entry, but you can 🙂
First Place Contest Prize:
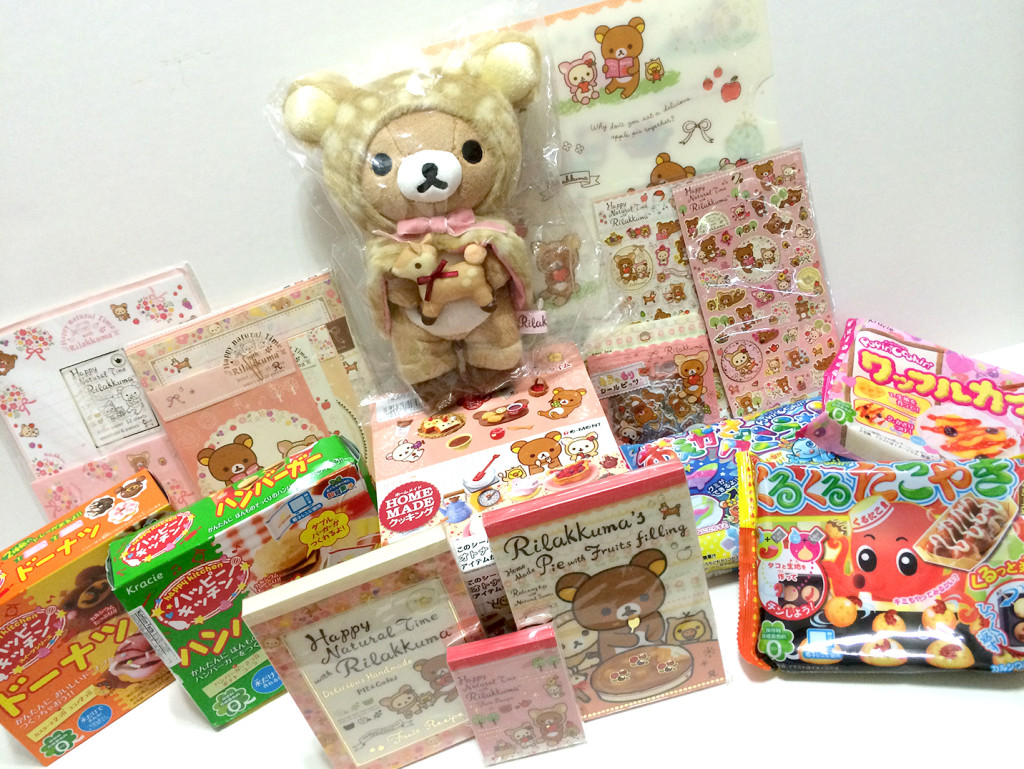
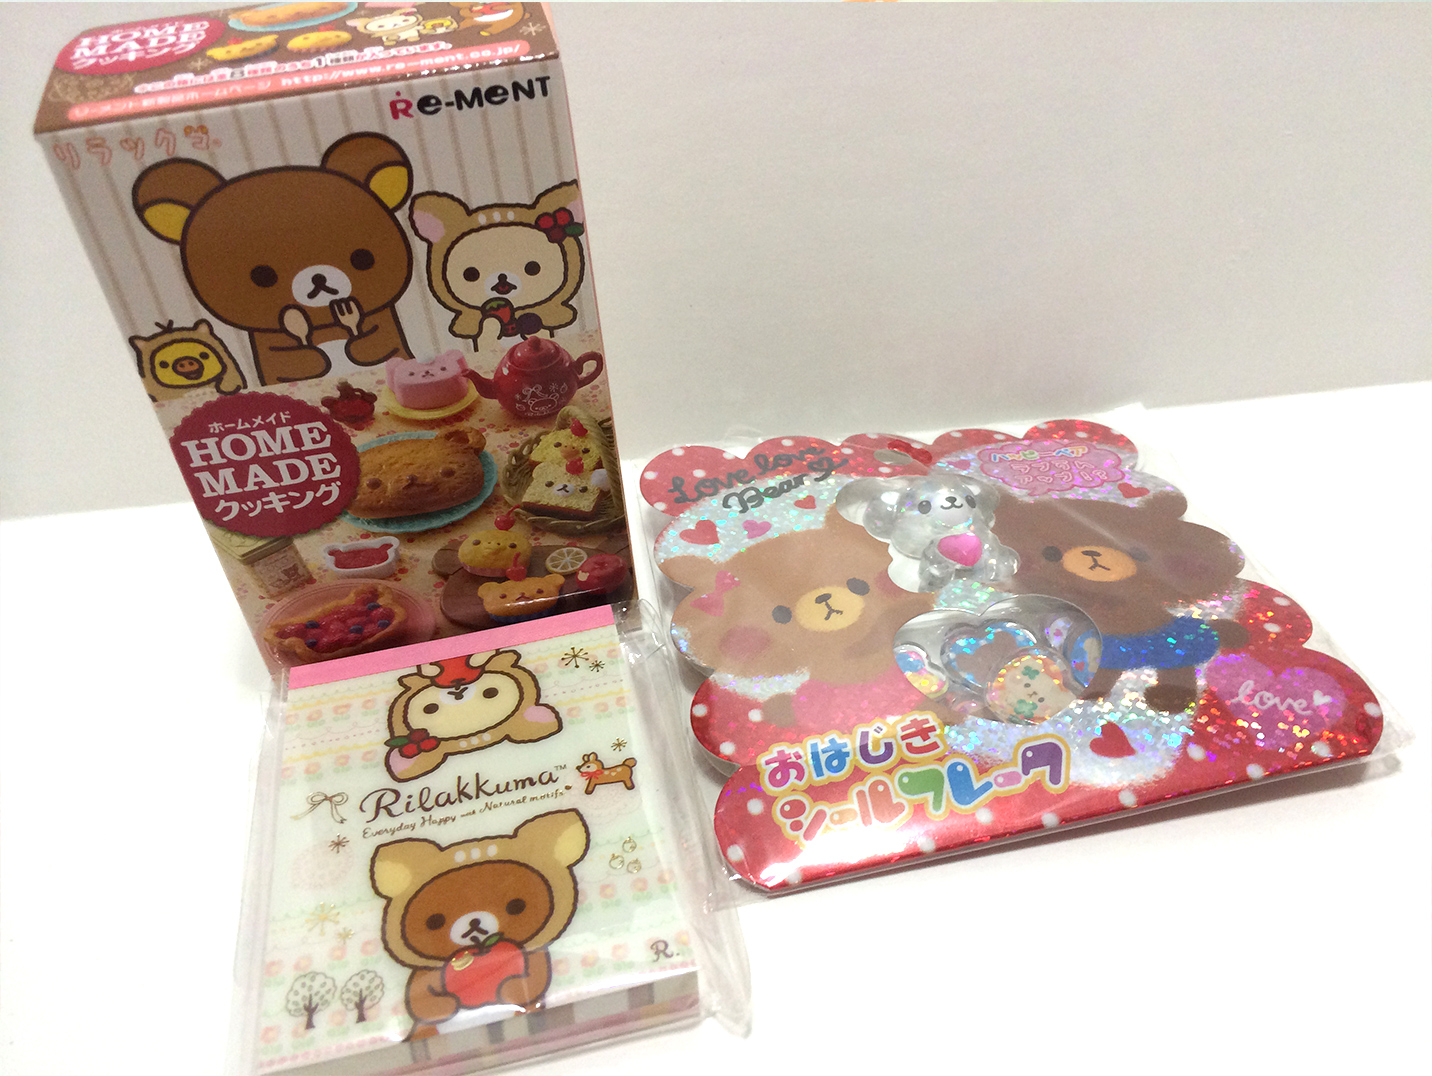
– Happy Natural Time Rilakkuma Re-ment (all 8 sets)
– Rilakkuma Deer Plush
– 2 Rilakkuma Sticker Sheets
– 1 Rilakkuma Sticker flake sack
– 2 large memo pads
– 1 mini memo pads
– 2 lettersets
– 1 plastic folder
– 5 DIY Candy Kits (Waffle Kit, Gummyland, Hamburger Set, Donut Set, Takoyaki Set)
To enter the giveaway portion, all you need to do is comment on the blog post and tell me your favorite woodland creature.
Giveaway Prize:
– 1 Happy Natural Time Re-ment (blind box)
– 1 Sticker flake sack
– 1 mini memo pad
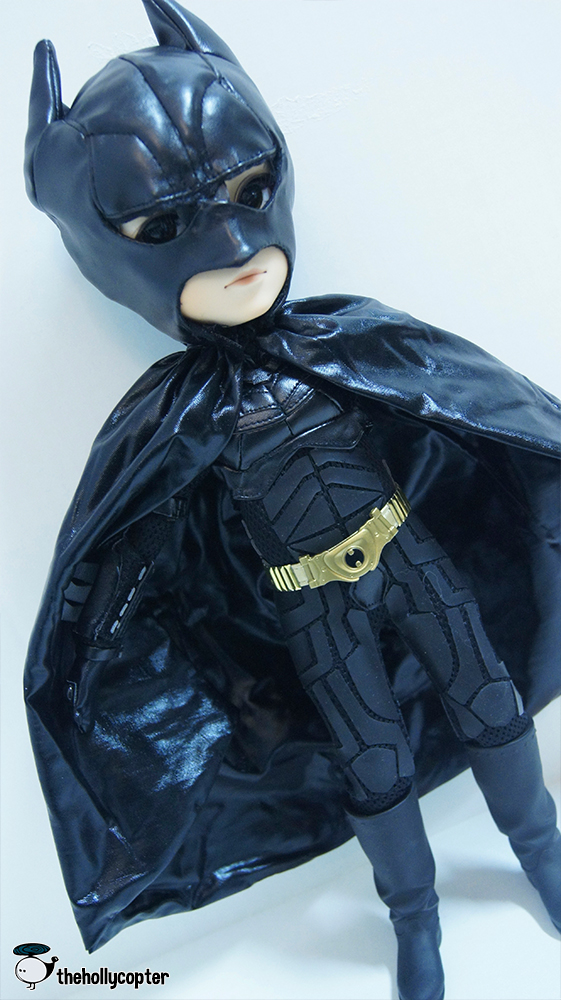
Taeyang Batman
At first I didn’t like Taeyangs. They seems a bit too feminine for me, especially the ones with lots of makeup.
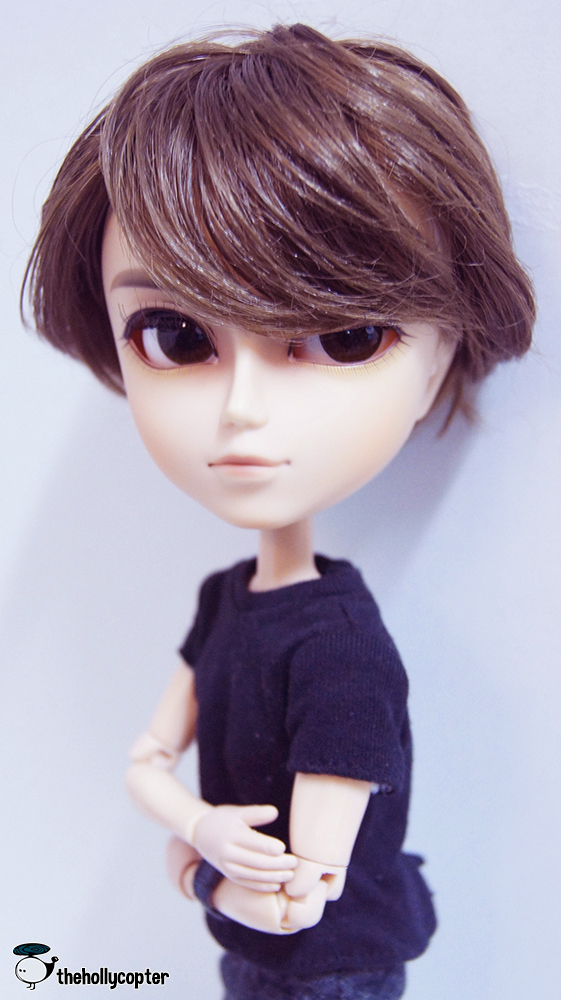
BUT I decided I wanted one, so after scouring the internet I found Taeyang Batman, who has minimal makeup and more manly (not long, or weird colored) hair!
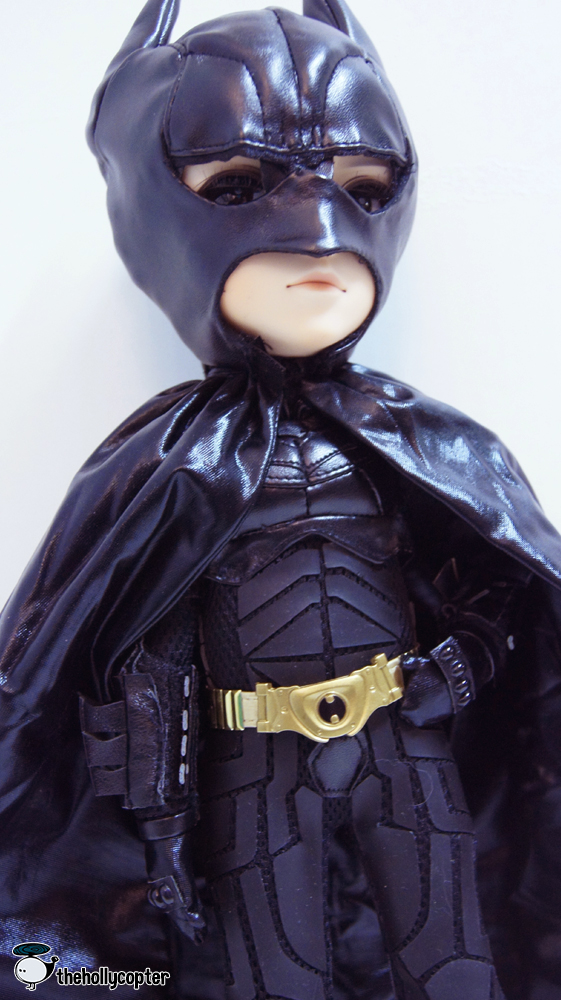
He’s so cool! He came in this really sweet Batman outfit that is SUPER detailed. It has a mesh undersuit with rubber details, gloves, arm hook things, his awesome cape, boots and mask! I’m quite impressed with his outfit.
I didn’t keep him in his suit for long, I just wanted him for his body (I’m shallow like that!)
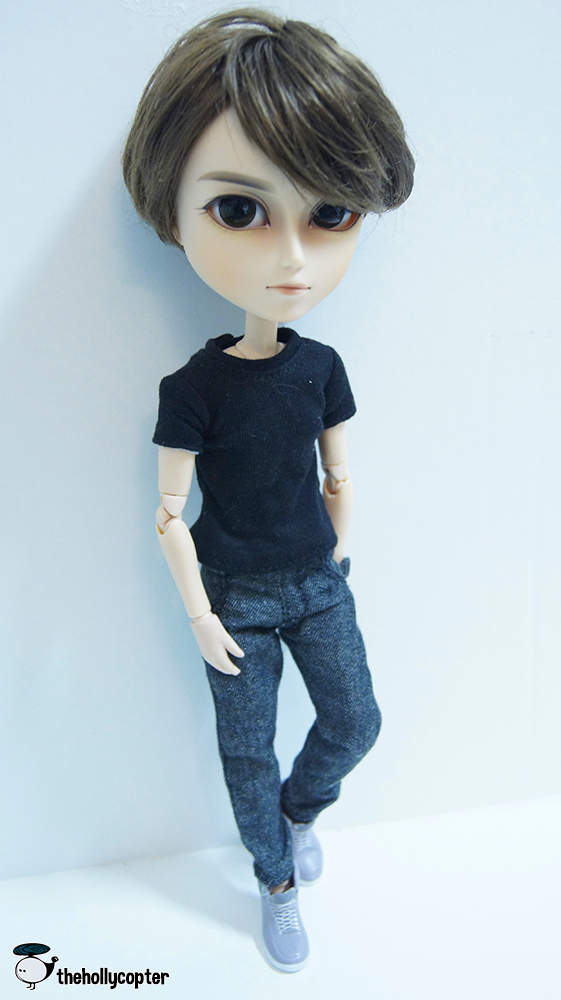
After stripping him of his outfit, de-crunching his hair and dressing him up…
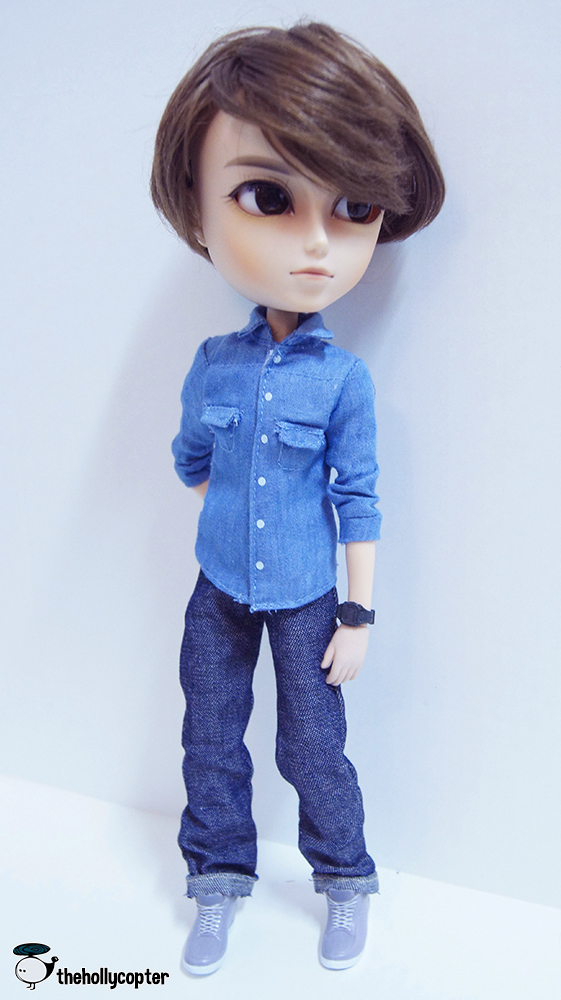
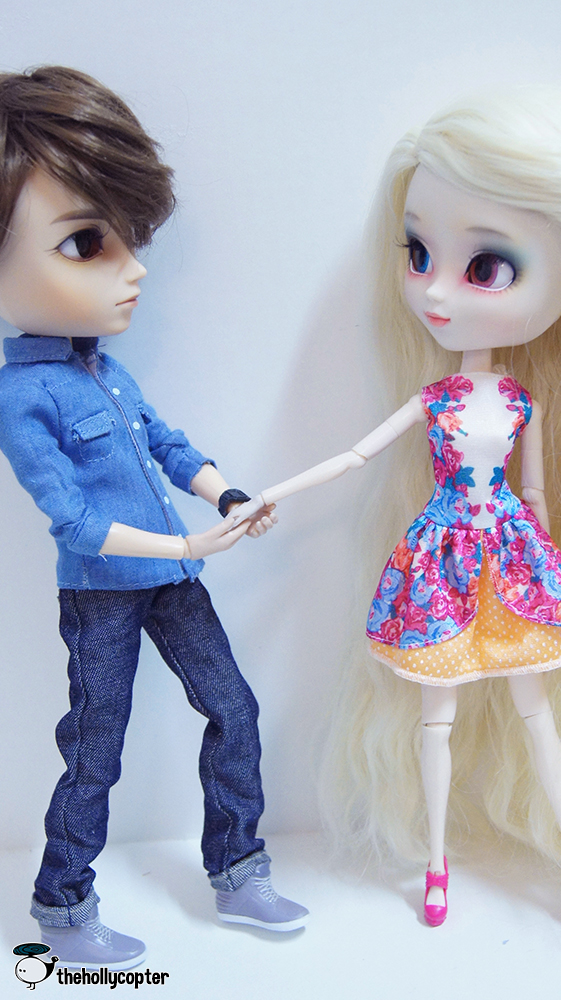
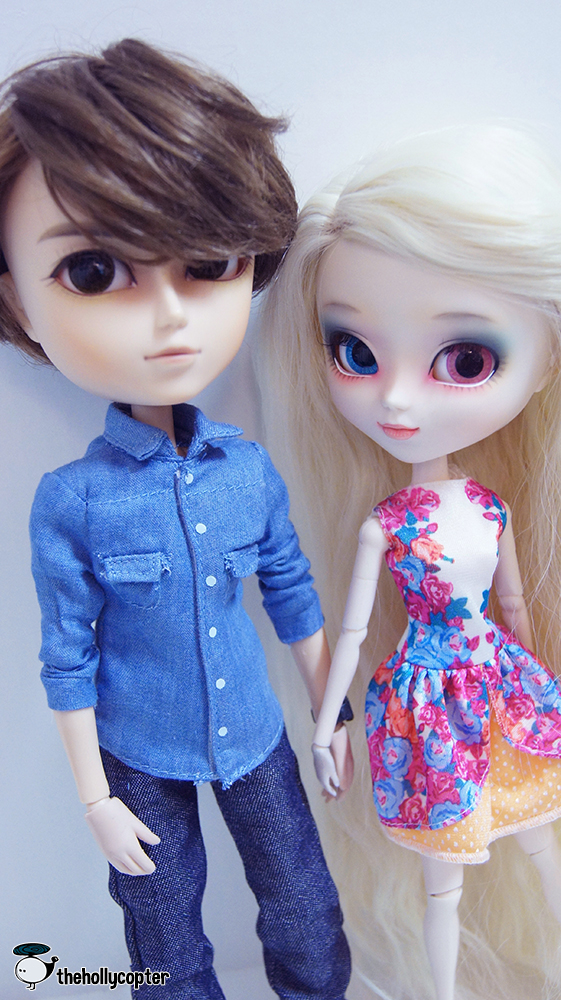
TA-DA! I dressed him in a combination of clothes from a Justin Bieber doll, One Direction dolls and a James Dean doll. I find that the celebrity dolls have a bit nicer clothes than the Ken clothes, but maybe I just haven’t found that much. I used some fabric softener in water to soften his hair and did my best to style it. I like it for now and will hold off on re-wigging him for now. I’ve named him Colt!
The only thing I had an issue with is his STUPID LIMBS kept falling off! His arm joint is completely broken and his hands and feet won’t stay in well. I’m going to have get him a new body, which isn’t too bad, I’m just disappointed that a doll that cost such a pretty penny isn’t more durable!
For now, Colt is courting Sophie until I get Pullip Io which I plan to make Colt’s girlfriend. So Sophie is the stand-in for now, and she doesn’t seem to mind 🙂
So overall I’m really happy with him, I wish his body didn’t fall apart, but I like his face and am so happy with his manliness! Lol!